


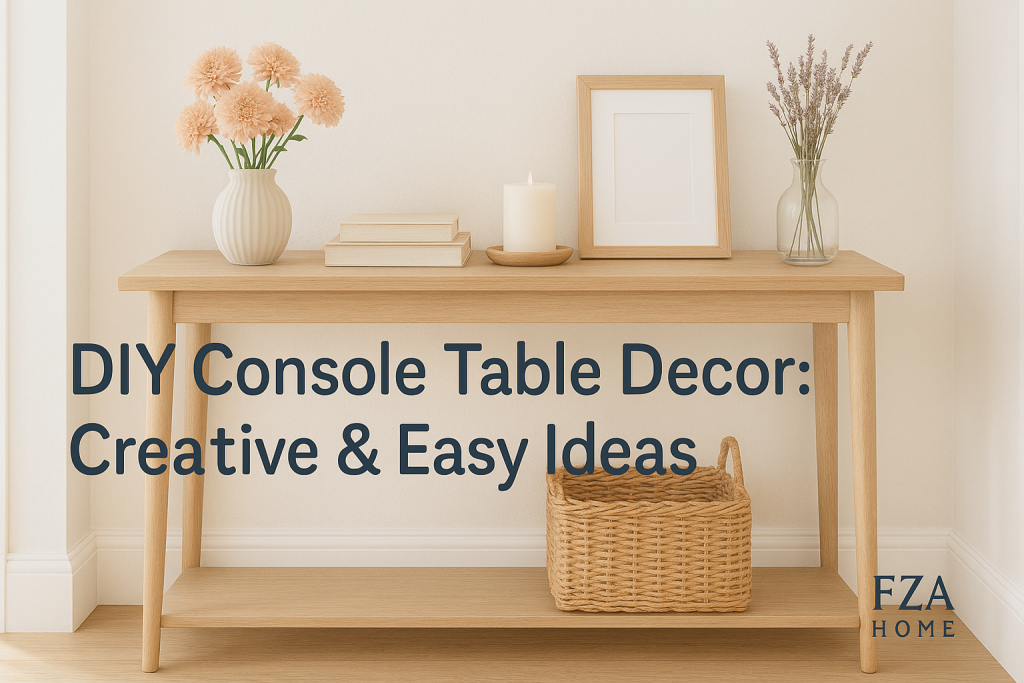
Console tables, those slim, often overlooked surfaces nestled against entryway walls or behind sofas, punch way above their weight in home décor. They serve as the first impression when you or guests enter a room, setting the tone for the rest of the space. A well-decorated console table can instantly communicate your style—whether it’s modern minimalist, cozy farmhouse, or eclectic bohemian. Beyond aesthetics, console tables also offer functional staging areas for keys, mail, or decorative trays. By focusing on this transitional zone, you can subtly guide the eye from one room to another, creating a sense of harmony and flow throughout your home.
Benefits of DIY Over Store-bought Decor
Opting for DIY decor on your console table instead of grabbing mass-produced items from big-box stores brings several advantages:
- Cost Savings: High-end decorative pieces can carry hefty price tags. Creating your own accents—like a painted wooden tray, stenciled vase, or repurposed picture frame—cuts costs dramatically.
- Creative Control: You choose every detail: color, texture, size, and arrangement. This level of customization ensures the final look perfectly complements your existing décor and personality.
- Sustainability: DIY often involves upcycling or repurposing materials you already own—a wooden crate becomes a chic storage basket, or thrifted books transform into a pedestal. This reduces waste and extends the life cycle of items that might otherwise be discarded.
- Skill Development: Each project hones your crafting abilities—painting, stenciling, basic carpentry, or floral arranging—so you build a toolkit for future home projects.
- Personal Satisfaction: There’s genuine pride in seeing a blank console table evolve into an eye-catching vignette you assembled with your own hands.
Embracing DIY for console table decor empowers you to experiment fearlessly, recycle creatively, and curate a space that truly feels like home.
Planning Your Console Table Makeover
Assessing Your Space and Style
Before hauling supplies from the craft store, take a moment to analyze your console table’s surroundings. Is it nestled in a narrow hallway, nestled behind a sofa, or anchoring an entryway? Note ceiling height, wall color, nearby furniture styles, and natural light sources. Understanding the environment helps you choose decorations that fit the scale, complement the palette, and play off existing design elements.
Next, identify your personal style. Browse home décor blogs, Pinterest boards, or Instagram hashtags like #consoletabledecor and pin ideas that resonate. Are you drawn to crisp monochrome arrangements with metallic accents, or do you prefer layered textures—wood, rattan, and woven fabrics—for a boho vibe? Pinpoint two or three key inspirations to guide your color and material choices.
Measuring and Proportion Guidelines
A successful console table styling balances scale and proportion. As a general rule:
- Height: The tallest object (lamp, vase, or sculpture) should be about two-thirds the height of the console table, or at eye level when standing.
- Width: Leave 20–30% empty space on either side; a crowded tabletop feels chaotic.
- Depth: For narrow tables under 12 inches deep, stick to flat décor items—picture frames, trays, or books—so you maintain a clear walkway.
Grab a tape measure and note:
- Table height and width
- Depth of the table’s surface
- Distance from the floor to potential wall hangings (if adding art above)
Use painter’s tape on the wall or tabletop to map out where key items (lamp, mirror, centerpiece) will go—this “dry run” ensures the final arrangement feels cohesive and balanced.
Defining a Color Palette and Theme
Selecting a limited color palette unifies your console table decor. A classic formula is the 60-30-10 rule: 60% dominant color (the tabletop or wall behind it), 30% secondary color (larger décor items), and 10% accent color (small pops). For example, if your console table sits against a neutral grey wall (60%), choose décor in complementary blues or greens (30%), and accent with metallic gold or warm terracotta pieces (10%).
Themes—such as coastal, industrial, or vintage—help further refine material and color choices. A coastal theme might feature whitewashed wood, seagrass baskets, and turquoise accents. Industrial styling employs metal trays, Edison-bulb lamps, and dark timber. Decide on one overarching theme and select items that reinforce it, ensuring each piece feels part of the same story.
Essential Materials and Tools
Common Decorative Materials (Paint, Fabric, Greenery)
Stocking up on a few versatile materials unlocks endless styling possibilities:
- Chalk or latex paint: For quick up-cycles on trays, frames, or small furniture.
- Stencils and patterned paper: Great for adding designs to plain vases or lamp shades.
- Fabric remnants or ribbons: Use to wrap books, create bows, or line trays.
- Decorative trays: Provide a base for vignette groupings and protect surfaces.
- Greenery: Fresh or faux. Eucalyptus, ferns, and small succulents inject life and texture.
- Books: Hardcovers with attractive spines become impromptu risers or standalone décor.
- Baskets and boxes: Hide clutter (keys, mail) and lend textural warmth.
Choosing materials in advance means you can mix and match until you find a layout you love—no last-minute craft store runs required.
Must-Have Tools for DIY Decor
Your toolkit needn’t be elaborate. Essentials include:
- Paintbrushes and foam rollers: A range of sizes for detailed or broad painting.
- Hot glue gun: Fast adhesion for fabric, foliage, or accent pieces.
- Scissors and utility knife: Clean cuts on paper, fabric, and tape.
- Measuring tape and level: Precision is key for straight lines and balanced groupings.
- Painter’s tape: Protects surfaces when painting or stenciling.
- Sandpaper (medium and fine grit): Smooths surfaces for painting or distressing.
With these basics, you can tackle nearly any small-scale DIY accent for your console table.
Safety Gear and Prep Supplies
Never overlook preparation—both for quality results and personal safety:
- Drop cloths or old newspapers: Protect floors and surrounding furniture.
- Dust mask and gloves: When sanding or handling spray paint.
- Ventilation: Open windows or use a fan if working with primers or varnishes.
- Cleaning rags and mild detergent: Wipe down surfaces before painting to ensure good adhesion.
With a little planning and the right prep, your DIY projects will look polished and professional—and you’ll avoid accidental spills or health hazards.
Fundamental DIY Techniques
Painting and Distressing Wood Surfaces
Transform plain wood trays, picture frames, or small accent tables using chalk paint for a matte, contemporary finish. Apply two thin coats, sanding lightly between each for extra smoothness. To achieve a vintage, timeworn look:
- Base coat: Apply a darker paint color first.
- Top coat: After drying, paint a lighter shade.
- Distressing: Once the top coat cures, sand edges and flat surfaces lightly until the undercoat peeks through.
Seal with a clear wax or matte varnish to protect your work and maintain that soft, aged patina. Distressed accents pair beautifully with both rustic and modern décor, adding depth and character to a console table display.
Stenciling and Freehand Art
Stencils allow you to replicate intricate patterns—geometric shapes, botanical motifs, or even custom monograms—on vases, trays, or wooden blocks. Secure the stencil with painter’s tape, apply paint with a stencil brush in a dabbing motion, then remove carefully to avoid smudges. For a more organic look, try freehand painting: simple botanical silhouettes or abstract brush strokes can create eye-catching vignettes that look gallery-worthy but require only basic painting skills.
Decoupage and Wallpaper Accents
Decoupage transforms ordinary objects into striking focal points. Using Mod Podge or clear-drying glue:
- Adhere patterned paper or fabric to the surface of trays, small boxes, or picture frames.
- Smooth out bubbles, let dry, and apply multiple top coats of glue to seal and protect.
You can also repurpose wallpaper scraps—especially textured or metallic varieties—for backing a mirror or lining a decorative tray. These small pops of pattern draw the eye and add bespoke flair to your console table.
Styling Basics: Layering for Visual Interest
Height, Texture, and Color Balance
Effective console table styling leverages layers—varying heights, diverse textures, and a cohesive palette. Start with a primary anchor piece, such as a lamp or large vase. Then build around it with medium-height items: books stacked horizontally or a mid-size planter. Finally, fill in gaps with low pieces—decorative objects, trays, or small frames. This triangular arrangement guides the eye and prevents a flat, monotonous look.
Mix materials: smooth ceramics, woven baskets, metallic trays, or glass vases. The contrast in texture keeps the display tactile and dynamic. Use color sparingly; let one dominant hue shine, support it with a secondary tone, and inject a small accent color to add punch.
The Rule of Three and Odd Numbers
Grouping items in odd numbers—three or five—naturally feels pleasing. For instance, place three decorative objects of different heights on one side, balanced by a taller lamp and a medium-size plant on the other. This asymmetrical balance feels curated, not forced. You can also create clusters—three candles on a tray, five small succulents in a row—building harmony without uniformity.
Using Trays, Books, and Decorative Objects
Trays serve dual purposes: they define a contained styling area and protect surfaces from scratches or spills. Place a scented candle, a small stack of coasters, and a decorative bowl for keys on a tray. Books, especially with attractive spines, make excellent risers—elevating smaller décor and adding visual layers. Top a stack with a small sculpture or object d’art. Finally, sprinkle in personal touches—family photos in minimalist frames, travel souvenirs, or meaningful trinkets—to make your console table uniquely yours.
Seasonal and Themed Console Table Ideas
Transforming your console table décor with the seasons is a fantastic way to keep your space feeling fresh and on-trend year-round. By swapping in a few key elements—colors, textures, and accessories—you can evoke spring’s blossoms, summer’s laid-back vibe, autumn’s warmth, or winter’s festive glamour without a complete redesign. Seasonal décor also gives you permission to be playful: mix unexpected pieces, layer in natural accents, and let each season’s palette guide your choices.
Spring Refresh with Florals and Light Hues
As soon as daylight stretches longer and temperatures rise, it’s time to lighten up your console table. Start by replacing heavy or dark décor items with fresh floral arrangements—real tulips, daffodils, or cherry blossoms in a simple ceramic pitcher or glass vase. Swap out dark trays for pastel-colored or whitewashed ones, and introduce light-reflecting elements like a mirrored tray or crystal accents. Incorporate soft textiles—a small linen runner in mint green or pale blush sets a breezy backdrop. Add a handful of spring-themed objects: a bird figurine, a small potted hyacinth, or a bowl of painted eggs. Keeping the overall palette in whites, greens, and blush prevents clutter and achieves an airy, rejuvenated look.
Summer Coastal Vibes
When summer arrives, channel laid-back coastal charm. Think driftwood accents, woven seagrass or rattan baskets, and soft blue and sandy tan hues. Replace flowers with dried palm fronds or pampas grass in a tall vase. Layer in a striped table runner or piece of nautical rope for texture. Display a bowl of polished sea glass or a cluster of shells collected on vacation. Illuminate the scene with faux-candle lanterns or battery-operated fairy lights nestled inside a hurricane glass. The goal is an informal, beach-house feel—balanced, relaxed, and ready for long summer evenings.
Autumn Harvest and Warm Tones
As leaves turn amber, bring that cozy warmth indoors. Select rich, earthy colors—burnt orange, deep burgundy, and moss green—to update your console table. Swap in botanicals like small pumpkins, acorn clusters, or dried wheat stalks in a rustic metal pitcher. Use a dark wood or copper tray to corral scented candles—think apple spice or pumpkin chai. Layer in a wool or knitted runner in caramel or rust tones for extra texture. Place a stack of hardcover coffee-table books about fall recipes or nature on one side, topped with an antique brass object for visual interest. This approach instantly conjures autumn’s comfort and abundance.
Winter Holiday Glam
When the holidays near, let your console table sparkle. Start with a metallic tray—gold or silver—to hold votive candles, pine-cone clusters, and ornament balls in jewel tones. Add greenery: a mini fir wreath, eucalyptus garland, or faux boxwood stems arranged in glass cylinders. Introduce twinkling string lights woven through the display for a cozy glow. Accent with mirrored or glass spheres for reflection and glam. Finally, drape a festive fabric runner—velvet or plaid—underneath. The result is a sophisticated holiday vignette that feels celebratory without overwhelming the space.
Incorporating Greenery and Natural Elements
Bringing life to your console table décor through greenery and natural accents not only adds texture and color but also purifies the air and uplifts your mood. Whether you favor real plants or low-maintenance faux options, this chapter helps you create a verdant vignette that anchors your décor.
Easy Indoor Plants and Planters
If you’re new to plant care, opt for hardy species like snake plants, ZZ plants, or pothos—they tolerate low light and infrequent watering. Place them in stylish planters: terrazzo pots for a modern look or woven baskets for boho flair. Succulents and cacti in small ceramic pots also fit beautifully on console tables and require minimal upkeep. For a layered effect, vary pot sizes and heights. A tall plant at one end balanced by a trio of tiny succulents on the other creates harmony.
Faux vs. Real: Pros and Cons
Real plants bring authentic life, natural scent, and the satisfaction of nurturing a living organism—but they demand care: watering schedules, proper lighting, and monitoring for pests. Faux plants, on the other hand, offer year-round greenery with zero maintenance. High-quality silk or plastic replicas can look remarkably realistic. If you lack natural light or tend to forget watering, faux is a smart choice. To maximize realism, choose planters with fresh-looking soil and dust leaves occasionally so they don’t appear neglected.
Terrariums, Branches, and Dried Flowers
For a unique twist, display glass-top terrariums filled with moss, pebbles, and miniature air plants (like tillandsias). Their transparent sides add depth and intrigue. Branches—birch bark, eucalyptus stems, or foraged willow—arranged in tall vases introduce architectural lines and organic movement. In autumn or winter, dried flowers (hydrangeas, lavender, or bunny tails) in muted palettes look elegant and require no watering. Group a selection of these natural elements with decorative stones or a small wooden bowl of pine cones to evoke the outdoors indoors.
Lighting and Mirrors: Amplifying the Decor
Proper lighting and reflective surfaces can dramatically elevate console table styling by creating ambience, depth, and visual balance. These elements not only showcase your décor but also make your entryway or living area feel brighter and more inviting.
Table Lamps vs. String Lights
A table lamp serves as both a décor piece and a functional light source. Choose a lamp in a material that complements your style—ceramic for modern, brass for glamorous, or wood for rustic settings. The lamp’s shade color and shape influence the light quality; a translucent shade diffuses light softly, while a darker shade concentrates glow downward. For a whimsical touch, string lights in warm white can be draped across mirror frames or woven through greenery. Battery-operated options hide cords and let you place them anywhere. While tabletop lamps anchor one side of the console, string lights add sparkle and informal playfulness.
Mirror Placement for Depth and Light
Mirrors double space and bounce light around the room. Hang a large mirror directly above the console table so it reflects artwork or a chandelier opposite, instantly brightening the area. For a more dynamic look, lean a mirror against the wall atop the table—this casual placement works well in eclectic or bohemian interiors. Cluster two smaller mirrors of different shapes to create an artful arrangement. The key is to position mirrors so they pick up natural or artificial light sources, making the console table display feel larger and more open.
DIY Mirrored Backdrops and Frames
If you’re up for a weekend project, craft a framed mirror or mirrored backdrop. Purchase a plain MDF board, adhere mirrored tiles or a sheet of acrylic mirror, then frame it using decorative trim. Paint or stain the frame to match your console table’s finish. This oversized DIY mirror becomes the ultimate backdrop, reflecting your decorative objects and adding a sense of luxury. Alternatively, customize thrifted frames by adding mirror panels inside—an unbeatable budget-friendly way to capture the gleam of a designer mirror.
Upcycling and Repurposing Items
Embracing upcycling and repurposing not only stretches your budget but also injects character and story into your console table décor. With a little creativity, everyday objects can become bespoke accents.
Thrift Finds Turned Chic Accents
Scour thrift stores or flea markets for vintage frames, candle holders, or small wooden crates. A chipped picture frame can be repainted in your accent color and used to frame a mirror or art print. Old candlesticks—spray-painted matte black or metallic gold—make elegant supports for taper candles. A wooden crate, sanded and stenciled, transforms into a rustic storage box. Each piece you rescue and revamp has a history, giving your décor authenticity and soul.
Vintage Books, Baskets, and Sculptures
Stack antique or leather-bound books to elevate smaller décor items—perhaps a tiny sculpture, pocket watch, or ceramic animal figurine. Woven baskets, once relegated to laundry rooms, work beautifully on a console table to corral items like mail or keys. Look for unusual vintage finds—an old camera, a set of opera glasses, or decorative apothecary jars—that double as conversation starters. By mixing era-defining pieces with modern accents, you achieve an eclectic, layered effect that feels intentional.
Painting and Refinishing Old Pieces
Even chipped or faded wood can be revived. Strip away old varnish, sand surfaces smooth, then refinish with a stain or paint color that ties into your palette. Consider distressing edges lightly for a shabby-chic look or applying a high-gloss finish for a contemporary twist. Metal objects (like a discarded drawer pull or frame) can be spray-painted and sealed to match your décor. This approach not only saves money but also reduces landfill waste—plus, there’s immense satisfaction in turning “trash” into treasure.
Personalization: Showcasing Art and Photos
Your console table is a prime spot to display what matters most—family memories, travel mementos, and personal art. Thoughtful personalization transforms generic décor into a narrative of who you are and where you’ve been.
Gallery Wall Over Console Table
A curated gallery wall above your console table draws the eye upward and ties together tabletop displays. Mix framed photographs, art prints, and small mirrors in a cohesive layout—use matching frames for unity or varied styles for an eclectic gallery. Plan the arrangement by laying frames on the floor first or tracing them with paper on the wall, then hang using picture-hanging strips or nails. The resulting installation feels like an extension of the table’s vignette, creating depth and layered storytelling.
Displaying Framed Photos and Artifacts
On the tabletop, mix framed family photos with a few non-personal art objects—perhaps a small painting by a local artist or a lithograph print. Use varying frame sizes and orientations (portrait and landscape) to keep the arrangement dynamic. Group two or three on one side—propped against the wall or on small easels—and balance with a lamp or plant on the other side. Incorporate unique items like a travel postcard mounted on a mini easel or a handcrafted clay bowl from a vacation.
DIY Photo Ledges and Floating Shelves
Photo ledges are an easy way to layer frames and decorative objects without committing to nails everywhere. Install a slim floating shelf above the table and lean an assortment of frames and canvases against the wall. You can adjust and swap items at will, rotating photos seasonally or when new artwork inspires you. Floating shelves of varying lengths create visual interest—just be sure they’re anchored securely and painted or stained to match your console table for a unified look.
Budget-Friendly Shopping Hacks
Dollar Store Decor Upgrades
When you think “dollar store,” you might picture cheap plastic trinkets—not exactly the stuff of designer console tables. But with a discerning eye, budget shops can be goldmines for DIY accents. Look for plain terra-cotta pots and give them a fresh coat of chalk paint in your accent color. Flip through the candle aisle for simple glass votives or lanterns—remove dated stickers, paint or wrap them in jute twine, and you’ve got rustic candleholders for under a dollar each. Wooden picture frames can be sanded and spray-painted metallic or matte black to match your theme. Even inexpensive faux greenery (eucalyptus sprigs, ferns, or boxwood stems) can be arranged in thrifted jars or recycled glass bottles for a surprisingly high-end look. The trick is to focus on basic shapes and neutral pieces you can transform, rather than pre-decorated items that scream “cheap craft store.”
Seasonal Clearance and Flash Sales
Seasonality is your friend when hunting for décor deals. At the end of each season, home goods retailers slash prices—think 60–80% off communal centerpieces, tabletop pumpkins, or holiday garlands. If you spot a clearance bin of out-of-season décor, grab items in your palette, even if they say “Christmas” or “Halloween” on the tag. A copper-tone ornament from December clearance becomes a chic accent in summer if you display it with pink peonies and rattan trays. Many stores also host flash sales online—sign up for email alerts at your top retailers (HomeGoods, Target, Anthropologie) so you’re the first to know when lamps, decorative trays, or mirror frames go on steep discount.
Online Marketplaces and Swap Groups
The internet has turned furniture thrifting on its head. Check Facebook Marketplace, Nextdoor, or local Buy/Sell/Trade groups for console tables or accessories at rock-bottom prices (often free). Look for people giving away old wooden frames, candlesticks, or small tables—these can be repurposed into plant stands or side accents. For decorative objects, explore Etsy’s “digital download” section for printable art you can frame yourself, or search for bulk lots of vintage books you can flip through for interesting spines. Don’t forget neighborhood swap groups: sometimes neighbors are eager to “gift” décor they no longer love. Be polite, quick to respond, and ready with a vehicle to pick up larger items.
Maintaining and Refreshing Your Display
Quarterly Swap-Outs and Rotation
A console table isn’t a static installation—it thrives on seasonal refreshes and the occasional rearrangement. Every three months (or whenever your decorating itch strikes), remove everything and start from a blank slate. Store off-season pieces—like autumn gourds or summer shells—in boxes labeled by season. Then, pull out stored décor that fits the current quarter: spring florals in March, cozy textiles in September, and sparkling ornaments in November. This rotating curation keeps your entryway feeling dynamic, and it’s a low-effort way to rediscover forgotten pieces you already own.
Cleaning and Care Tips
Dust settles quickly on horizontal surfaces, so make weekly or biweekly dusting part of your routine. Use a soft microfiber cloth to gently wipe vases, trays, and lamp bases—this prevents dust from scratching finishes when you inevitably move items. For glass and metal accents, a quick spray of glass cleaner (applied to a cloth, never directly on décor) will remove fingerprints and smudges. If you’ve painted or stenciled pieces, avoid abrasive cleaners; instead, use a lightly dampened cloth. Finally, clean under and behind your console table at least twice a year to prevent dust bunnies from building up and drifting onto your perfectly styled tabletop.
Storage for Off-Season Decor
Good storage makes seasonal rotation painless. Invest in clear plastic bins with tight-sealing lids—label them with tags like “Winter,” “Floral Spring,” or “Autumn Textures.” Wrap delicate items, such as glass candleholders or ceramic vases, in tissue paper or bubble wrap. Stack labeled bins in a closet or under the bed for easy access, and keep your most-used décor (neutral trays, picture frames) within arm’s reach. This organization ensures you’re never scrambling to find last year’s faux evergreen garland—and prevents accidental breakage during off-season months.
Troubleshooting Common Decor Mistakes
Avoiding Clutter and Overcrowding
One of the most frequent missteps in console styling is simply adding “too much.” If your table resembles a crowded shelf at a flea market, it’s time to edit. Start by removing 30–40% of items—especially small knick-knacks that don’t contribute to your theme. Ask yourself: does each object serve a purpose—visual interest, storage, or function? If not, relocate it. Embrace negative space: leaving intentional gaps between groupings allows key pieces to shine and keeps your display from overwhelming the senses.
Mindful Color and Pattern Mixing
We all love a pop of color or a bold pattern, but over-mixing can create visual chaos. Limit yourself to three main colors: a dominant neutral, a secondary hue, and an accent tone. Similarly, restrict patterns to two motifs—say, stripes and botanicals—so they complement rather than compete. If you’re uncertain, step back and view your console table from a few feet away; if the eye can’t rest, you might need to simplify. Replacing one patterned pillow or tray with a solid counterpart can instantly harmonize the look.
Correcting Scale and Proportion Errors
Scale issues often result in décor feeling “off-balance.” If your centerpiece lamp towers four feet above the table, or conversely, a tiny figurine looks lost on a broad surface, adjust proportions. Apply the “two-thirds” rule: the tallest item should be roughly two-thirds the height of the table, and the widest grouping should take up about two-thirds of its width. If something feels disproportionate, swap it for a shorter or taller piece. You can also group smaller items on a stack of books to elevate them into proper scale.
Advanced DIY Projects for Enthusiasts
Building a Backdrop or Paneling
For a truly custom look, extend your console décor into the wall behind it. Install lightweight shiplap panels, beadboard, or even peel-and-stick wallpaper in a bold print. These backdrops frame your console as if it were an art installation, adding depth and architectural interest. If you’re comfortable with basic carpentry, build a simple wooden panel system: attach 1×4 battens horizontally, paint them your accent color, and mount faux greenery or decorative hooks for seasonal ornaments. This project transforms an ordinary wall into a statement-making backdrop in a weekend.
Crafting Custom Lighting Fixtures
Elevate your space—and your DIY cred—by creating a bespoke lighting element. One idea is a pendant light made from a Macramé rope shade: knot a simple net pattern, then secure it around an existing bulb fixture. Alternatively, repurpose an antique chandelier by spray-painting it and adding Edison-style bulbs for a modern-industrial vibe. If wiring feels intimidating, opt for battery-operated LED puck lights mounted underneath a floating shelf, casting a warm glow onto your console table display without any electrical work.
Integrating Smart Home Elements
Take your console table into the 21st century by adding smart functionality. Hide a smart hub (like an Amazon Echo Dot) inside a decorative box with cutouts for sound. Place a wireless charging pad beneath a thin wooden tray to power phones discreetly. Install a motion-activated LED strip along the back edge of the console surface for ambient lighting that kicks on when you approach. These subtle tech integrations keep the tabletop clutter-free while making everyday routines—like dropping keys or charging devices—neater and more automated.
Frequently Asked Questions
1. How often should I refresh my console table décor?
Refreshing your console table every season (approximately every three months) strikes a perfect balance between novelty and stability. Seasonal swaps—like light florals in spring or warm-toned accents in autumn—keep your display feeling fresh. However, if you spot a new DIY piece or thrifted treasure that really excites you, don’t hesitate to swap earlier. The goal is to maintain a space that reflects your evolving style without turning your tabletop into a cluttered swap-meet.
2. What’s the easiest DIY project for a console table beginner?
A painted tray transformed into a centerpiece is one of the simplest yet most impactful DIYs. Start with an inexpensive wooden or metal serving tray, sand any rough spots, then apply two coats of chalk paint in a color that complements your palette. Seal with clear wax or matte varnish. This tray serves as a base for candles, books, or small plants—instantly unifying the look and protecting your table surface.
3. How do I balance functionality and style on my console table?
Aim for a mix of practical and decorative items. Use a stylish tray or small basket to corral essentials like keys, mail, or sunglasses—keeping daily clutter out of sight. Then layer in decorative elements: a lamp for light, a small sculpture for texture, and a framed photo for personalization. By combining “useful” and “beautiful” objects, your console table remains both an eye-catching vignette and an everyday staging area.
4. Can I use console table décor ideas in other parts of my home?
Absolutely! The same styling principles—layering heights, mixing textures, odd-number groupings, and choosing a cohesive palette—apply to bookshelves, mantels, kitchen islands, or bathroom vanities. Simply adjust item sizes to fit the surface depth and overall scale of the furniture. Just like a console table, these spaces benefit from a curated balance of form and function.
5. How do I incorporate color without overwhelming my space?
Start with a neutral base (your console table or wall color) and choose one secondary hue plus one accent tone. For instance, on a white table (neutral), pick navy (secondary) and mustard yellow (accent). Introduce the secondary color via larger items—like a vase or runner—and sprinkle in accent-colored objects—such as small candles or decorative balls. This restrained approach lets color pop without creating visual chaos.


