


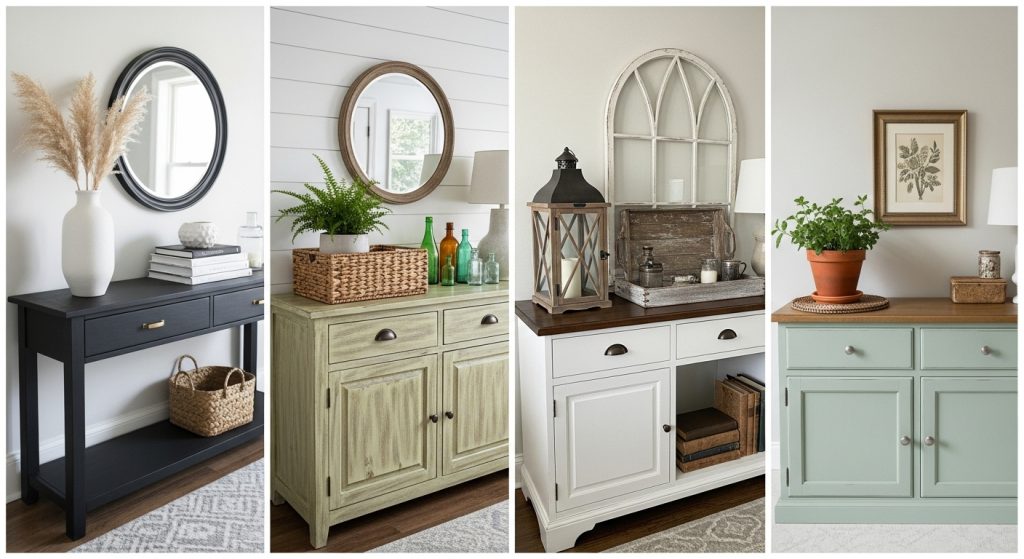
These budget-friendly farmhouse console makeovers are the definitive guide to achieving a high-end, custom look without the designer price tag. The warm, inviting appeal of the farmhouse aesthetic is highly sought after, but authentic rustic furniture can be expensive. The secret to achieving this look affordably lies in the art of the makeover. A simple, secondhand console table can be transformed into a stunning, character-filled focal point with a few clever techniques and a bit of creativity.
This professional guide provides a comprehensive, step-by-step framework for your next project. We will explore how to source the perfect piece, the essential preparation steps, and the detailed painting and distressing techniques that create authentic vintage charm. These expert tips will empower you to create a beautiful, expensive-looking farmhouse console table that is a true reflection of your personal style and your smart budget.
What is the Core Principle of a Budget-Friendly Farmhouse Makeover?
The core principle is to create the illusion of age and history on an inexpensive piece of furniture. This is achieved by adding layers of texture, a muted color palette, and carefully chosen hardware. The goal is not to create a perfect, factory-like finish, but to replicate the natural wear and tear that gives authentic farmhouse pieces their soulful character.
This philosophy celebrates imperfection. It is the art of turning a simple, mass-produced, or outdated piece of furniture into something that feels one-of-a-kind and collected over time. By focusing on techniques that add character—such as distressing, whitewashing, and updating hardware—you can elevate a basic Console table into a high-end design feature. The global market for DIY home improvement products continues to grow, demonstrating the popularity of these hands-on projects.
How to Source the Perfect Console Table for a Makeover?
Sourcing the right console table is the critical first step. The ideal candidate is a piece that is structurally sound but cosmetically outdated or uninspired. The goal is to find a “blank canvas” with good bones at a very low price. This allows you to invest your budget in the transformative materials.
Why Are Thrift Stores and Flea Markets the Best Source?
Thrift stores, flea markets, and online marketplaces are the best sources for finding makeover candidates. They are treasure troves of sturdy, well-made older furniture that is simply out of style. Look for solid wood pieces from the 80s and 90s. These are often made with better materials than modern flat-pack furniture. Their traditional shapes can be easily updated with a farmhouse finish. The secondhand furniture market is a sustainable and incredibly cost-effective resource.
What “Good Bones” Should You Look For?
When sourcing a table, look for “good bones.” This means the piece is:
- Structurally Sound: It should not be wobbly or have any major structural damage. Check that the legs are secure and the joints are tight.
- Made of Solid Wood: While laminates can be painted, solid wood is much easier to work with, especially for distressing techniques. It provides an authentic base for a rustic finish.
- Has a Good Shape: Look for a simple, classic silhouette. A table with simple turned legs, a straight apron, or a functional lower shelf has great potential. Avoid overly ornate or complex shapes that do not align with the simple farmhouse aesthetic.
What is the Essential Preparation for a Flawless Finish?
Proper preparation is the non-negotiable foundation of a professional-looking makeover. Skipping these crucial steps is the most common mistake beginners make. It will lead to a finish that peels, chips, or simply does not adhere properly. A few hours of prep work will guarantee a durable and beautiful result.
How Do You Properly Clean the Furniture?
The furniture must be thoroughly cleaned to remove all dirt, grease, and grime. A solution of warm water and a degreasing cleaner is ideal. The piece should be scrubbed with a cloth or a soft brush. Pay special attention to the top surface and any areas that are frequently touched. After cleaning, the piece should be rinsed with a clean, damp cloth and allowed to dry completely.
Why is Sanding a Critical Step?
Sanding is a critical step for creating a surface that the paint can adhere to. This is a process of “scuff sanding,” not stripping. The goal is to lightly abrade the existing finish to create a “tooth” for the new paint to grip. A medium-grit sandpaper (120-150 grit) is perfect for this. The entire piece should be lightly sanded until the shiny top coat appears dull. After sanding, all dust must be removed with a vacuum and a tack cloth.
When is a Primer Necessary?
A primer is necessary when you are painting a light color over a very dark wood or when you are painting over a particularly slick or glossy surface. A high-quality, stain-blocking primer will:
- Prevent Bleed-Through: It stops tannins from the dark wood from bleeding through and staining the light-colored paint.
- Improve Adhesion: It creates an ideal surface for the paint to bond to, ensuring a durable finish. Applying one or two thin coats of primer is a professional step that guarantees a better final result.
What Are the Best Painting Techniques for a Farmhouse Look?
The painting technique is where the transformation truly happens. The goal is not a perfect, uniform coat. It is a finish with texture, depth, and a sense of age. Chalk paint and milk paint are the two most popular choices for achieving an authentic farmhouse look due to their unique properties.
How to Use Chalk Paint for a Matte, Vintage Finish?
Chalk paint is the go-to choice for many farmhouse makeovers. It is a specialized paint known for its ultra-matte, chalky finish. It is very thick and provides excellent coverage, often in just one or two coats. One of its biggest advantages is that it adheres to almost any surface with minimal prep, often without the need for priming.
- Application: Apply the chalk paint with a good-quality brush, using long, even strokes. For a more textured, aged look, use crisscross brushstrokes.
- Finishing: Chalk paint must be sealed to be durable. The most common sealant is a soft furniture wax. The wax is applied with a cloth or a special brush and then buffed to a soft sheen. This protective layer deepens the color and provides a durable, water-resistant finish.
What is the Appeal of Milk Paint for an Authentic Aged Look?
Milk paint is a traditional, all-natural paint that comes in a powder form and is mixed with water. It is known for its ability to create a genuinely old, “chippy” look. When applied to a previously finished surface, it will often naturally crackle and chip in some areas as it dries. This creates an authentic, timeworn patina that is very difficult to replicate with other paints.
- Application: Milk paint is much thinner than chalk paint. It is applied in several thin coats. A bonding agent can be added to the first coat for better adhesion if a less chippy look is desired.
- Finishing: Like chalk paint, milk paint is porous and must be sealed. A furniture wax or a tough topcoat can be used to protect the finish. The market for specialty paints like milk paint has grown as consumers seek more authentic finishes.
How Do You Master the Art of Distressing?
Distressing is the technique of intentionally weathering and aging the new paint finish. This is the key to creating the illusion of history and use. The secret to professional-looking distressing is subtlety and a “less is more” approach. The goal is to replicate the natural wear that would occur over many years.
What is the “Wet Distressing” Technique for Chalk Paint?
Wet distressing is a gentle and easy technique that works beautifully with chalk paint. After the paint has dried but before it has been sealed, use a damp, lint-free cloth. Gently rub the areas that would naturally show wear. These are typically the corners, the edges, and any raised details. The damp cloth will reactivate the paint and lift it off, revealing the wood or the primer underneath. This method creates a very soft, naturally worn look.
How to Use Sandpaper for a Classic Distressed Look?
Using sandpaper is the classic distressing method. After the paint has dried, use a medium-grit sandpaper (150-grit) to sand away the paint on the high-wear areas. Focus on the edges and corners. The amount of pressure you use will determine how much paint is removed. Start with a light touch. It is always easier to remove more paint than it is to add it back. This technique creates a crisper, more defined distressed look than the wet method.
What is the “Wax Resist” Method for a Layered Look?
The wax resist method is used to create a layered, multi-color distressed look. After applying a base coat of one color, simply rub a wax candle or a block of paraffin wax on the areas where you want the base color to show through. Then, apply your top coat of a different color. Once the top coat is dry, lightly sand the areas where the wax was applied. The top coat of paint will not adhere to the wax, and it will sand off easily. This reveals the base color underneath, creating a beautiful, layered, and authentically aged appearance.
How to Upgrade Hardware for an Instant Transformation?
Upgrading the hardware is one of the quickest, easiest, and most impactful parts of any budget-friendly farmhouse console makeover. The knobs, pulls, and hinges on a piece of furniture are like its jewelry. Changing them can instantly update the entire style of the piece.
What are the Best Hardware Styles for a Farmhouse Look?
The best hardware styles for a farmhouse look are those that feel simple, utilitarian, and a bit vintage.
- Simple Black Knobs: Classic, round knobs in a matte black finish are a timeless and versatile choice.
- Cup Pulls: Bin or cup pulls in an aged bronze, brass, or black finish are a quintessential farmhouse element. They are often seen in vintage kitchens and apothecaries.
- Antique-Style Bail Pulls: Bail pulls with a simple, decorative backplate can add a touch of traditional charm.
- Cast Iron Hardware: For a more rustic, industrial look, simple cast iron pulls or knobs are an excellent choice.
How to Easily Fill Old Hardware Holes?
When you replace hardware, the new pieces may not line up with the old screw holes. Filling these old holes is a simple process. Use a high-quality, paintable wood filler. Press the filler firmly into the hole with a putty knife. It is best to slightly overfill the hole, as the filler will shrink a bit as it dries. Once the filler is completely dry, sand it smooth so that it is perfectly flush with the surrounding wood. It is now ready to be primed and painted.
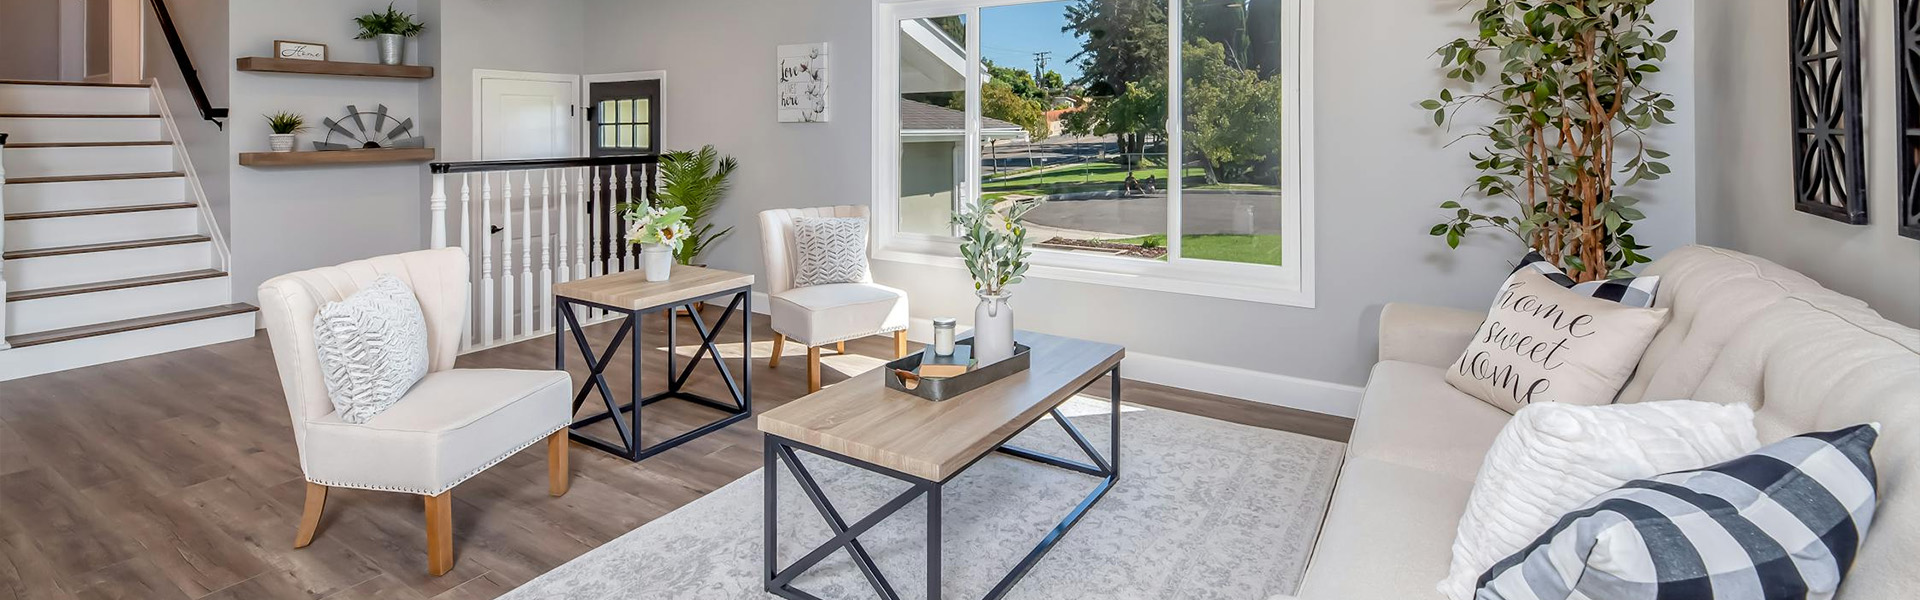
How to Style Your New Farmhouse Console?
Styling your newly made-over console table is the final, rewarding step. This is where you bring the piece to life. The principles of farmhouse styling emphasize natural textures, vintage finds, and a sense of cozy comfort.
The key is to create a layered and collected look, as detailed in our guide on how to style a rustic console table with vintage decor. Start with a large, rustic anchor piece on the wall, like a wood-framed mirror. Add height with a simple lamp and some natural branches in a stoneware crock. Layer in texture with a stack of old books and a woven basket underneath for storage.
For a narrow hallway, the principles remain the same, but the scale is adjusted. Opt for a tall, narrow mirror and a slender buffet lamp to emphasize verticality without taking up too much space. A full guide to cozy farmhouse console table ideas for narrow hallways provides more specific tips for these challenging spaces.
Conclusion
These budget-friendly farmhouse console makeovers prove that a stunning, high-end look is achievable for a fraction of the cost. The key is a combination of smart sourcing, meticulous preparation, and the artful application of paint and distressing techniques. By transforming a simple, secondhand piece of furniture, you are not just saving money; you are creating a unique, character-filled piece that is infused with your own creativity. It is a rewarding process that results in a beautiful and authentic piece of farmhouse rustic console inspiration that will welcome you home for years to come.


